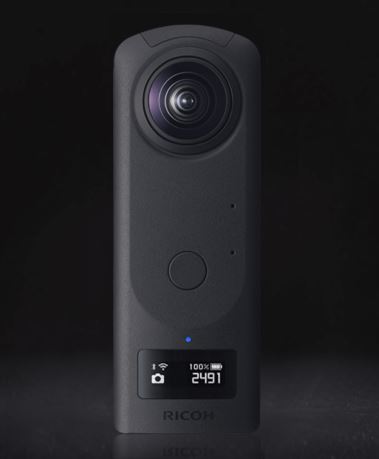
Workflow 360 Panos

So, I’ve been working with the Theta Z1 camera and developing a workflow.

One of the biggest challenges in this was to find a HDR-Merging software. I know, Photoshop and Lightroom do merge HDRs, but the result bares too much work. So I evaluated various software.

While all those packages bare their advantages or shortcomings my main intend was really to find the one that gives me a «one click» result.

My conclusion was to buy SNS-HDR. Firstly because it creates a very good starting point and very natural look. Runner-Up was easyHDR. I particularly like how one can manually paint masks for the de-ghosting. Which is one of the weaknesses of SNS-HDR. But for now I purchased a license to SNS-HDR.

One thing that has to be noted is that the developer of SNS-HDR is not investing much time into the software unfortunately. He maintains it and is responsive when emailed. But the forum is kinda clumsy and old fashion plus manual post approval is in place. But I am all about visual and in this case also the ease of use.

I am after a workflow that is semi automatic for lower budget productions. With this setup a lot of 360 spheres can be shot and processed at an affordable budget compared to using my motorized DSLR setup.

What I wanted, as said, was a semi automated workflow. So drag and drop and continue without a lot of manual work and I was also looking to find a way to enlarge the image. As big as they are coming from the camera, I was curious to see if this can be pushed towards printing quality results.

After changing it a few times here’s what I ended up as a workflow.

  1. Shoot brackets in manual mode, 2 EVs apart, 5 shots
  2. Import the shots to Lightroom for cataloging and tagging
  3. Merge the DNGs to an HDR
  4. Take this merged image back to Lightroom for further adjustments and local adjustments
  5. Opening the result in Photoshop and denoise it using Topaz Denoise AI
  6. Resize the image using Topaz Gigapixel AI
  7. Take the resized image to PTGui and stitch it to equirectangular
  8. Go back to Photoshop and fix the chromatic aberration and export to a flattened image
  9. Export the interactive to html using PanoramaStudio

Here’s the screenshot of the Excel sheet I created containing all the workflow information in detail.

While this seems a lot of steps it’s actually mostly clicking buttons, running actions in Photoshop and saving. Except in step 3 where I might adjust the parameters in SNS-HDR and step 7 where I paint a mask to eliminate chromatic aberration, retouch the shadow or reflection of the camera out and fix the nadir, plus place my logo at the nadir. How I do that is a secret, but I use Photoshop, despite the fact that they removed the 360 projection mode. I also own Affinity Photo which I got for this purpose, but I am skipping it for now as my 30+ years in Photoshop is an investment I will keep hanging on to as log as possible. Stubborn, yes! But those manual edits shall be kept short and effective 🙂 (Like there is something short and effective in a perfectionist mind…)

And off course the «authoring» of the final tour in PanoramaStudio. I am currently looking at alternatives to work more efficient in that area and I am evaluating 3DVista, Kuula. I really like Kuula. It creates nice transitions and it’s got a lot of features best described in Ben Claremont’s video here. The only thing it really lacks is the ability to export the tour to Google Street View.

There are tools that take care of this. I am currently evaluating Panoskin and GoThru. But ultimately I will switch to 3DVista, I already know that. But 500 Euros is hard to swallow when starting up a new business branch. And my main intend for now is to take nice 360 panos when I am out and about with our lovely dog Hira.

RICOH Theta Z1

I got a RICOH Theta Z1. I researched almost any 360 camera that is out there. OK, I did limit my budget to max 1500.-

The Theta Z1 became my choice mainly because of the 1 inch sensor. As good as the images from an iPhone (or alike) look, this only applies if there’s enough lights. The main 2 reasons for this is the small sensor and the tiny lens.

Here’s a unbiased review of the man himself, Mic Ty, which helped me a lot to make the decision. Mic is the source for all things 360. And his responsiveness is awesome. I encourage you to check out his YouTube channel, like and subscribe, or don’t, it’s up to you.

I will be using the Theta Z1 mainly for photography, so video was not my concern.

And when the 51 GB version landed I hit the «Buy Now» button.

PROs

  • Sensor Size
  • Shoots in DNG
  • Image quality
  • Manual modes
  • Sturdy Body
  • Plugins
  • Variable aperture
  • Standalone Stitcher (Windows & Mac)

CONs

  • Chromatic Aberration
  • No removable Battery!
  • Fixed Storage
  • Video not up to par
  • Screen is small (But quite irrelevant, since there’s a good app)

Stärnefee Panorama & Website

I had the honor to create 360 degree panoramas of this lovely store in Riggisberg called Särnefee. It’s an art-deco store with loads of treasures and beautiful things.


I also did their website and the detail photos in the store (mostly used as backgrounds on the website).

Nikon D810

I a proud to be a new owner of a Nikon D810. This is the best camera I ever hel in my hands. The design is just wow. Already when you pick her up, you ralize that this body is made for professionals (oh, wait, that’s sexist…). The features and the way the buttons are setup is very well thought through. Compared to the Canon D1100 I had, it’s a complete different realm. And off course, the best thing about the D810 is the pictures it delivers. The Sensor is a beast and the dynamic range it produces is phenomanal.
nikond810
I was split between the D750 and the D810. The D810 has the best Sensor you can get in a DSLR today. The D750 has a lot of new features like built in WiFi, swivel screen, awesome filming features etc. But for me the main reason to go for the D810 was the sensor. I am taking pictures of peoples paintings so they can print them in various sizes and therefore I need all the pixels I can get. Plus I was able to score a used body for the price of a new D750 at a professional shop. The body has only 9k exposures and Nikon warranty until the end of next year. So after almost a year of reserch and debates with myslef, the decision was easy.

DSGVO Cookie-Einwilligung mit Real Cookie Banner